Essential Fly Tying Vise Info
Is it fly tying vise or “vice”? The answer seems to depend which side of the Atlantic you swing a rod (or wind a bobbin)…but even then it’s not consistent! Here’s a complete guide to choosing and using the perfect vise for you. There’s even links to buy some of the models discussed in this article via Amazon if you’re inspired (with full disclosure that we would earn a commission from any qualifying purchases).
CLICK to Skip to featured vises
Whatever the spelling (vice/vise?), it’s a tool close to many a fly fisher’s heart. Creating your own fly that goes on to fool a fish is the completely addictive foundation of our sport; from classic dry fly fishing to tenkara to saltwater fly fishing and everything in between. As you can see in this video, I still love my 30-year old bargain “AA” model vice that I began my tying career with as a teenager…
Even if you fancy trying out the old-school methods of “no-vice” tying, one of the best stepping stones to gaining the thread control you need is by starting out with the aid of a vise. No wonder, then, folks get very attached to their personal models that, with luck, will be polished by use over many years. They are lovely, personal, things to hand on to your children and angling friends that you mentor. There’s more guidance on getting into fly tying here.
With many different designs and pricing-tags to suit absolutely all budgets – there is definitely a vise out there for you. At the same time, there can be quirks of design that are either mildly irritating to some tyers; or may mean that they are more prone to failure over time.
Some are just plain bad designs that never work properly even when brand new.
Anatomy of a Fly Tying Vise 101:
OK, you probably know this already but I want to make sure we are definitely talking about the same thing when it comes to labelling different parts of a vise! It is nowhere near a comprehensive list, but it is more than enough to get started while avoiding some confusion. A “material spring”, for instance, is really a standard accessory but relying just on the name alone you’d think it could be almost anything within the workings of a vice!
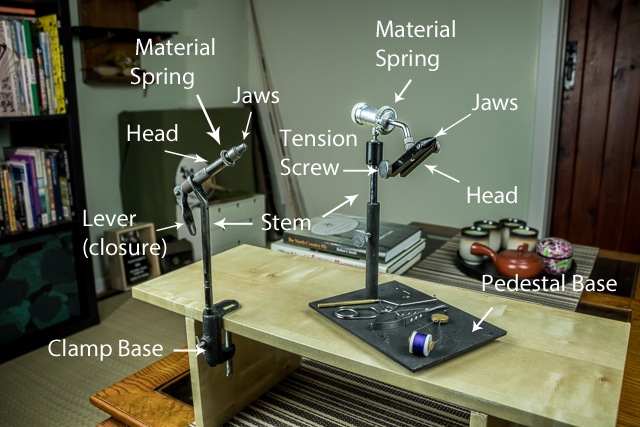
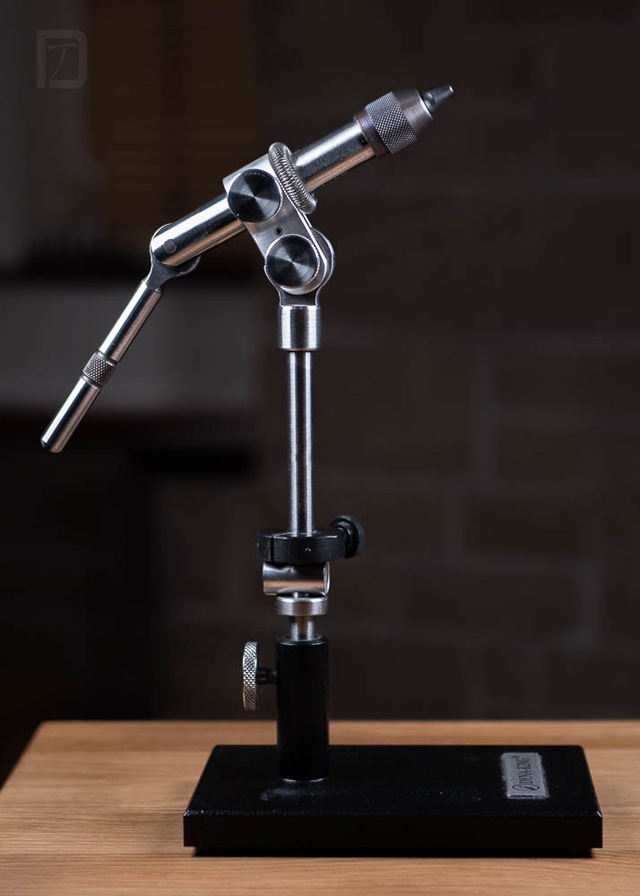
Stem
The part of a vise that connects the base to the main mechanism containing the jaws. A useful feature for a stem is the ability to adjust the height of the jaws. This way, it ensures that you can avoid back-ache by allowing you to hold your hands at a comfortable height (and also a good height to see what you are tying without crouching over the vice).
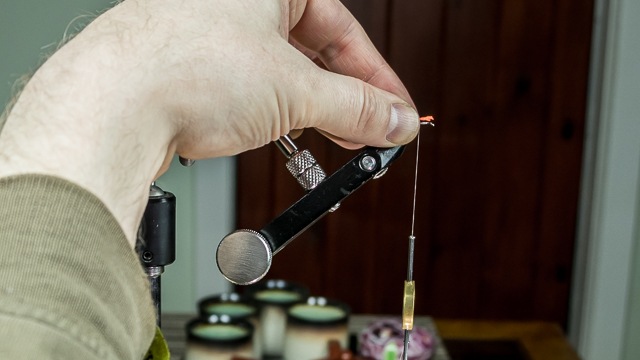
Jaws – Vital Fly Tying Vise Component
Probably the most important single component of any fly tying vise. These need to be made from a sufficiently hardened material (typically steel) to avoid developing indentations or even bending over time and losing their ability to grip the hook securely. There is an interesting trade-off between the size (and shape) of the jaws between their ability to cope with a large range of hook sizes, versus their durability and capacity to grip large hooks firmly. When jaws are very chunky it becomes difficult to tie smaller flies because the hook-gape becomes obscured. It’s also difficult to wrap materials or use tools easily on all parts of the fly with larger jaws. At the same time, very narrow jaws often don’t have the strength to grip thick wire large hooks (especially those used for salt water fly fishing or flies for large, predatory fish in freshwater too).
The more blunt and rounded the front edge of the jaws are – the more they obscure the part of the hook on the inside of the bend. Of course, the opposite is true, the more tapered the front edge of the jaws – the more access the tyer has to the inside of the hook bend. That becomes more important as hook size gets smaller.
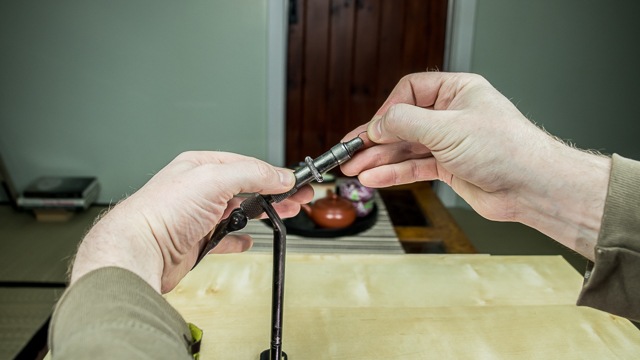
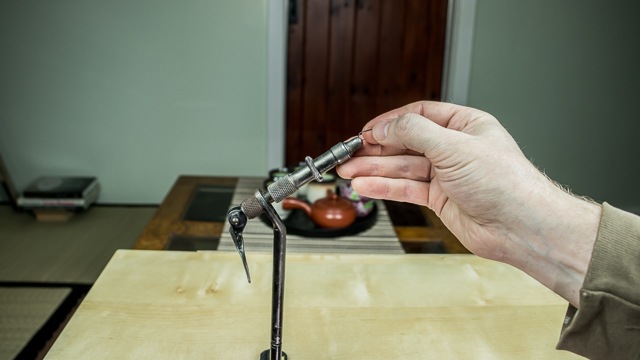
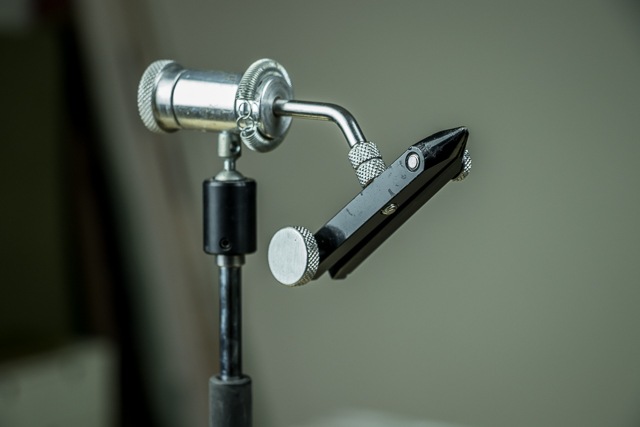
Head
This is a bit of a catch-all term for the housing of the jaw-fastening mechanism (ending in the jaws themselves of course). In many fly tying vises, the head connects to the “stem” (see labelled photo above); though some models also have additional articulating arms that allow greater flexibility in the positioning of the head and jaws. The infamous “Waldron” design is an example of that.
A clever use of a threaded barrel or collar type head on the classic and super-basic AA design of vice is that by twisting that collar, you can set how tightly the jaws fasten when the closure mechanism is fully cranked down. That allows you to match the wire diameter of the hook that you are tying on.
The AA vice (in common with many other models) exploits the mechanical advantage provided by an extended lever (and the clever shape of the curved edge which, as the lever is pressed down, has a gradually increasing separation between the securing pin and that edge) to create a secure closing mechanism…
Lever
One common option for closing and locking the jaws of a vice onto a hook, ready for tying. Typically situated either at the rear of – or as a side-arm to – the “head” of a vice. Classic examples of vises that use levers as a closure mechanism include the “AA” design (lever at the rear of the head) and the “Regal” (lever at the side of the head).
The ingenious thing about the Regal lever design is that it is used to open the jaws (rather than close them), which then return to the closed position under a consistent tension – regardless of the hook-size. This means that you never need to adjust the gap between the jaws to cope with different diameter hook-wires.
Tension Screws
Another common closure and locking mechanism for fly tying vice jaws is the use of two tension screws – one to set the initial gap between the jaws and one to crank up the final tension with the hook in place (most often situated at the rear of the head).
Tension screws on the stem of the vise are also very often used to set the extended height of the stem (and setting the direction that the head is pointing in!).
Base
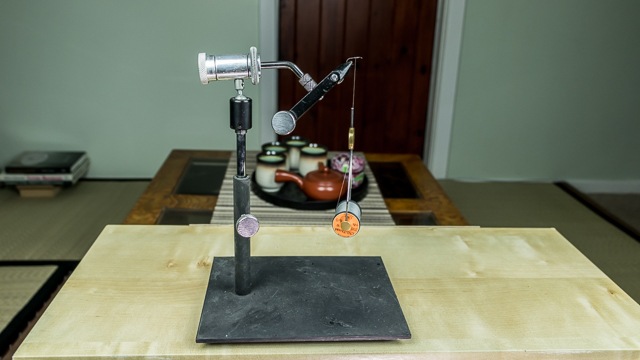
As you can see in several photos in this article, there are two main types of base for a fly tying vise. These are either a weighted, free-standing base (pedestal) or a clamp that attaches to the edge of your tying desk (clamp). The base has one, vital, function; to create a solid and completely stable foundation for the rest of the tool. If the base design is poor, the whole apparatus will move around when you are applying turns of thread or materials to your flies. This is INFURIATING, so it is not a glamorous part of the design – but it is vital.
Material spring on a Fly Tying Vise
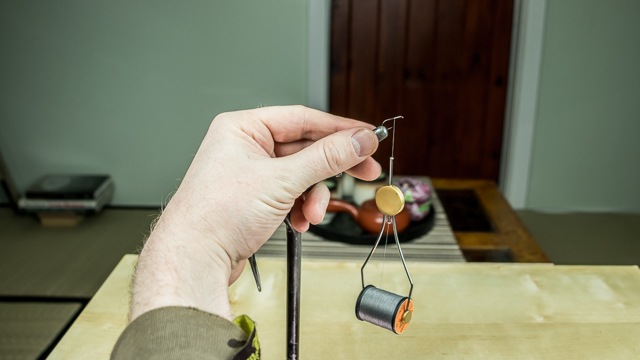
More of an accessory than a truly integral part of a fly tying vise – but these are so common (and the name can be sufficiently misleading) that they are worth including here. Their intended function is to allow materials that have been tied onto the hook shank to be drawn back and then held in place (out of the way of other tying operations).
Fly Tying Vise Basic Designs
First let’s separate out the different designs of fly tying vise. These categories represent the main decisions you’ll need to make to find your ideal vice.
Pedestal vs Clamp Fly Tying Vise Design
A “pedestal” vice uses a flat, heavy base to stabilise the main stem. Sometimes, the stem is also designed to be inserted into a much larger (usually wooden) material tray/tying desk type base. Pedestal vises tend to be kinder to your table-top than a clamp vice. They can also be re-positioned more quickly on whatever surface you are tying on.
On the downside, the relatively large and heavy base usually makes pedestal vices more difficult to travel with (a big exception to this is the very clever “Marco Polo” design vise – with a more lightweight “foot”). For that reason, most pedestal vises tend to be a bit more bulky to store away in a drawer when not in use.
If pedestal vices are not made with complete precision, it can lead to an annoying rocking to and fro during the act of tying your flies. For instance, the base of a pedestal vice needs to be completely flat (and with feet that are absolutely uniform) to avoid this problem.
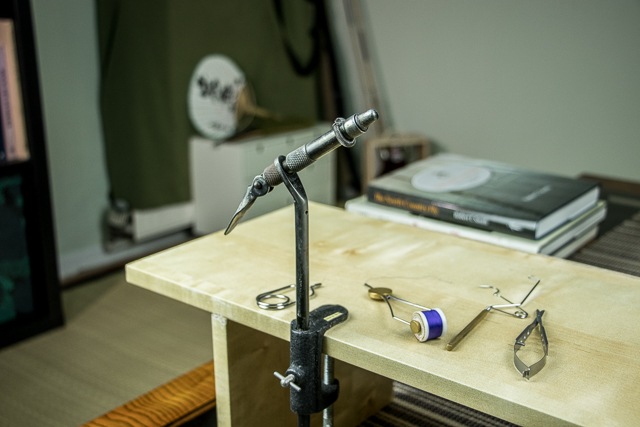
Clamp vises are usually easier to store when not in use and should generally produce a completely solid foundation during fly tying. It is a good idea to insert a padding material between the contact points of the clamp and the surfaces of the desk or table to which it is attached. That tip can save some “difficult” domestic conversations…
“Fixed” Fly Tying Vise
Normally confined to the lower-priced end of the market – although the Marco Polo is, again, a very notable exception to that general rule. These vices do not allow the head of the vice to be rotated while a fly is fixed within the jaws. In the video below of a fantastic trip to the Czech Republic in 2012 you can see the operation of the tension screws as well as the fixed head on the “designer masterpiece” Marco Polo travel vise:
When it comes to fixed vises if you want to examine the underside of your fly – or tie in materials underneath the shank – then you need to remove the fly (or at least partially open the jaws), turn it upside down and then re-fasten the hook in the jaws.
True Rotary Fly Tying Vise
To be a true rotary fly tying vise the design needs to:
- Rotate the hook shank perfectly around its own axis (with no “wandering” in and out of axis at different points along the shank)
- Have a smooth, rapid rotation mechanism that can be used to wind turns of thread onto the hook shank (instead of winding the bobbin holder around the hook shank)
Essentially, the main aim of a rotary vice is to be able to offer a material (floss, rib, thread etc.) up to the shank and then to turn a handle at the back of the vice which quickly and easily wraps that material around the shank. In theory (with practice), this could speed up the tying of flies – and it certainly gives a great degree of control when rotating the fly during tying.
Here is a video made by Eberhard Scheibe from Germany showing how he uses his rotary vise to spin peacock herl around his tying thread (as well as winding the body material and thread onto the hook shank):
However, it is notable that true rotary vices have not taken over and dominated the market in the way that they might be expected to if that specific function was such a major advantage/deal-breaker to most fly tyers.
“Partial” Rotary Vice (able to be twisted)
A more common feature is for a vice to be able to hold a fly locked in the jaws while the tyer rotates the vice head to examine the far side or the underside of that fly. It also allows the fly to be quickly twisted into any orientation around the axis of the shank to receive a material that you’d like to tie in at that point on the shank.
The shank may or may not be rotated perfectly around its own axis and there will generally not be a handle at the rear of the vice-head that can be cranked or quickly spun continuously (which is always a feature in a true rotary vise).
What to EXPECT to vary with price
Now we get to the real nitty gritty. The most obvious factor (and one that is common to almost any product) should be an increase in the overall build-quality and precision/consistency of components with higher prices. In addition, more innovative design and (often) a lower number of individual units that are manufactured each year are also associated with higher cost.
The combination of those design, manufacturing-process and material-choice factors tends to result in greater:
- Effective hook-size range
- Stability of hook
- Manoeuvrability of the fly during tying
- Range of adjustment for tying angle/height
- Durability
- Range of custom accessories (that attach to the vice)
- Access to the fly between the hook point and the inside of the hook “gape” (even on small flies)
Keep these factors in mind when looking at the selection of vises below (or any vises that you are considering buying).
Amazon Associate Links for a range of vises
If this is your first contact with Amazon Associate links – here’s a simple rundown of how it works.
The vises below are all available on Amazon (as well as other outlets). We’ve described our experiences with each example and, if you decide to order one for yourself (or as a gift), you might consider using our specific links below – so you’ll need to know exactly what that means
For orders that are made using the links on this page, we receive a commission from Amazon (typically around 5%). Obviously it is in our interest for purchases to be made in this way – and even though orders are fulfilled via Amazon our reputation would suffer from poor recommendations. At the same time, you should know that there is no additional charge made by Amazon to you.
In other words, the price to you when buying the same item through Amazon is identical whether or not our affiliate link is used. Our blog content, email lessons and product production relies on commissions and sales through this site, so we hope you don’t find the links and offers unreasonable to include on this topic?
So, if you were already keen to order one of the featured vises – using our specific affiliate link(s) would help to offset our running costs. At the same time, you are completely free to go and find those products on Amazon directly and ensure that we don’t receive any commission.
Buying a Fly Tying Vise: USA
Budget “Colorado” AA Fly Tying Vise
If I had to guess, the “AA” type design of vise has probably started more fly tying careers than any other. It is simple, super-affordable and uses an effective mechanism to securely clamp the hook. The clamp design makes it quite easy to pack and store – though the jaws make it a little more difficult to tie down to tiny hook sizes. Our simple text affiliate link is https://amzn.to/2GVGWjp
Mid-range PEAK Rotary Vise (Remarkable Features and Manufacturing at this Price)
Available as either Pedestal or C-clamp base (just pick from the drop-down menu). The full rotary function has a tension control that varies smoothly throughout the range “fully locked off” at one extreme through to “resistance-free rotation” at the other. Machined from steel, brass, aircraft aluminium and tempered, hardened-steel jaws. The pedestal version features a white powder coated base (with non-marking feet) that creates its own “sight disk/high contrast” background to highlight the details of your fly during tying. The effective hook-size range is from 2/0 right down to the smallest commercially-available hooks. https://amzn.to/2tTA7HL
Mid-range Dyna-King Kingfisher Fly Tying Vise
Robust, precision engineered pedestal vise with 360-degree rotation (though not full rotary) and a hook-size range from #22 up to 8/0. The plain text affiliate link is https://amzn.to/2V7vdlK
High-end Dyna-King Pro
JP’s current vise and used to fulfil his pro tying orders (and has proven to be extremely durable in that role). An excellent 360-degree rotatable vise with lockable four-position head-angle (in the vertical plane). Machined completely from aluminium and steel bar-stock. The standard jaws cope with hooks between #24 and up to 8/0. The simple text link for the Dyna-King Pro is https://amzn.to/2XgCwt9
High-end/Classic Regal Medallion (Side arm) Fly Tying Vise
Extremely popular with pro-tyers at international exhibitions – the unique spring-loaded jaw closure system that doesn’t require individual adjustment to cope with different gauge hook-wires is very secure and slick. Hook sizes between #22 and 1/0 are recommended for the standard jaws. The head can be rotated 360 degrees and can be moved through a vertical range of 220 degrees. Plain text associate link is https://amzn.to/2EmSo6l
High end/Travel: Marco Polo plus C&F Design Tying Tools
The definitive travel vise and ergonomically-packed tying tool kit (which saw near constant use in the evenings during our 2012 Czech Republic trip featured in the video on this page). Here is John’s personal vise assembled and ready for use (note the innovative light-weight pedestal design):
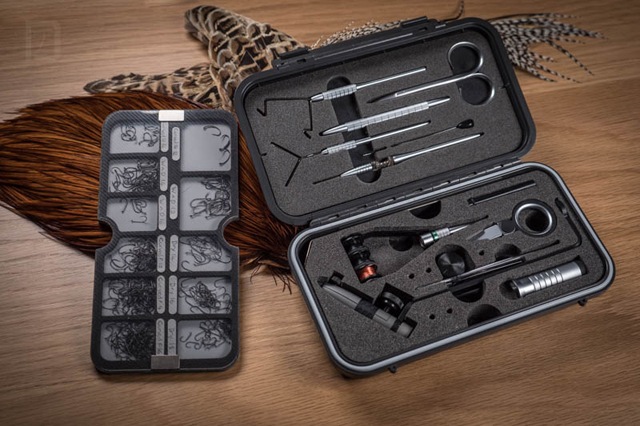
Simply the last word in slick, travel-friendly design (with a price-tag to match). The hook-box has been lifted out in the above photo to show the vise and tools stowed beneath. Just back in stock on Amazon here: https://amzn.to/2BZrm2W
Don’t see your ideal vice?
If you want to use the tips and guidance in this article to apply to alternative models, you can browse the results for “Fly Tying Vise” on Amazon.com on the following affiliate page:
Buying a Fly Tying Vice UK
Budget “Turrell” AA
The Turrell AA design vice provides that great, affordable introduction into fly tying that I’ve described in the USA section of this article. Our plain text associates link is https://amzn.to/2SfO4co
Budget/Mid-range Snowbee Flymate
This is the vice that I use for most of my tying. It’s inexpensive, offers 360-degree rotation and the jaws cope with hooks between size #24 and 8/0 as well as being extensively manoeuvrable in the vertical plane (due to a ball and socket joint between the stem and the arm connected to the head.
It is essential to know that you need to adopt the hand position shown in the tying tips section at the end of this article to ensure comfortable tying. A characteristic that some tyers can never adapt to is the possibility of pulling the head downwards if you apply a very large amount of downward tension with the tying thread.
When you first set up this vice there is a small allen-key screw in the black collar to the ball and socket joint. Tightening this ensures that the head is not pulled around when you don’t want it to be moved. The knurled disc at the rear of the vice arm allows the head to be rotated through 360 degrees with a hook secured in the jaws. The angle of the head can be micro adjusted during tying.
With all this being said, this is definitely a “marmite” vice which some people really like and others just will not get on with. The best predictor of this will be whether you feel you need an absolutely immovable head during tying…or whether you like the ability to quickly twist and re-angle the head with your non thread-winding hand during each tie. The simple text version of our Amazon.co.uk affiliate link is https://amzn.to/2GAM2lQ
Mid-range Apex Anvil
The Apex Anvil is the vice that JP owned before taking the plunge with the Dyna-King Professional (N.B. there are other UK suppliers for the Dyna-king that are more suitable than Amazon UK). He found it a very good vice at that price-point with precise jaws suitable for a wide range of hook-sizes. John also obviously feels that the increased durability if you are a professional tying many hundreds/thousands of flies in a year is worth the extra investment for the Dyna-King Pro.
However, an impressive range of hook sizes between #32 and 3/0, 360-degree rotation and supplied with both a pedestal and a C-clamp base (so you don’t need to choose one or the other option) make this an attractive option at this price. Be advised that the vice is not supplied with the bobbin-holder arm that is shown in the product picture; but it does come with both bases that are also pictured. Our plain text associates link is https://amzn.to/2V8g7wh
Top Range – Travel Vice system: Marco Polo
In contrast to the USA Amazon availability – we’re currently awaiting suppliers to replenish their stock of the Marco Polo on Amazon UK. Stockists local to you may be able to supply what you need in the meantime.
Don’t see the vise that you wanted?
If you want to use the tips and guidance in this article to apply to alternative models, you can browse the results for “Fly Tying Vise” on Amazon.co.uk on the following affiliate page:
Hand position tips for different vices
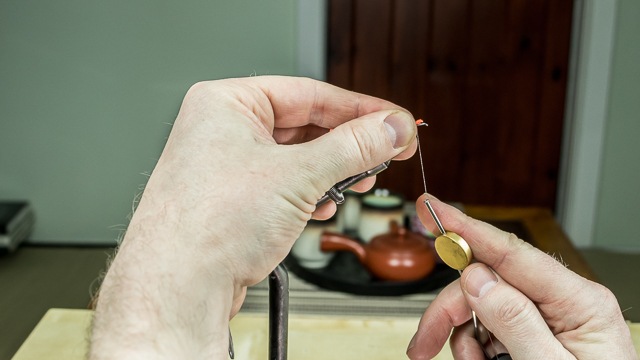
The angle of the stem and jaws greatly affect how you need to hold materials when you offer them up to the hook to tie in. For vices where the head projects at an angle above the top of the stem, it is easy to rest the heel of your hand on the rear of the head while offering materials up to the hook shank between finger and thumb (of the same hand).
This is quite similar to an artist resting their hand on a “Mahl stick” (those rods with a soft pad at one end that can be braced against the canvas without damaging it). When your hand is supported at that angle, tying materials pinched between your finger and thumb can be offered to the hook shank while they project straight-forwards/directly out from the tips of your thumb and index finger.
On the other hand, if the head of the vice is “underslung” beneath the highest point of the stem, you’ll need to alter your hand position. Instead of pinching materials so that they project straight out, it’s best to pinch them so that they project at a slightly upwards angle from your thumb and index finger.
While these differences are very slight and simple to achieve, if you are not aware that you need to pick up and pinch materials differently between each vise-design, it can really spoil your experience with a particular model. Even when you know this, it can still take some time and practice before a variation in hand-position or pinch-angle feels natural and easy.
Fly Tying Vise Guide: Conclusion
If I had to write a one-sentence verdict it would be this: “There absolutely IS a vise out there for everyone“. All budgets and all features are captured in the modern market-place. Using this guide (and particularly knowing a few of the tips to help you get the best out of different designs) should steer you to a good match for your own particular needs and aspirations.
As a quick summary checklist of questions to ask yourself (by working through each section of the article above):
- Do you need portability or a more permanent fixture?
- Pedestal or Clamp?
- How small will you typically be tying (and so what jaw design/profile do you need)?
- Is a Fixed head OK – or do you need frequent twisting to check/add materials to each side of the fly?
- Do you tie at a high enough volume to want a true rotary function?
Also – remember that many clamp vises tend to be relatively easy to pack into luggage. However, for ultimate style and slick portability (with a full set of tying tools), the Marco Polo is hard to beat if you have the budget.
OK then, what did we miss?
If there’s features or vises that you think should be here but aren’t – let me know in the comments below (you don’t need an account – just add two numbers together to prove you’re a real human!).
Paul

Very interesting Paul. After reading this I think I will go back and re-try my Snowbee Fly Mate Vice. I bought this a few years ago but couldn’t get comfortable with it, but I had just started tying at that time so probably my clumsy approach didn’t help.
Peter – I’d be extremely keen to hear how you get on (and whether you are able to alter the pinch-angle/hand-position with a little practice)…It’s important for me to understand other folks’ experience as well as my own in adapting to different vice head/stem constructions.
Paul
Nice post! You have found many different vices and shows the main advantages clear for all. Good work. In my opinion a good vise has to hold the used hooks properly. Forms and angles of the head seems to be a very personally preference. As a small hint of mine, I like to have fun a bit by my tying sessions. Thats why I like to make some things some different. My Norvise is more than 10 years in use. It is my beloved “Bodymaker”.
I really enjoy watching how familiar and easy you are with spinning up the body as well as the peacock herl and tying thread on your Norvise Eberhard. Thanks for videoing yourself in action and also letting me use the clip here.
Paul
Working by twisting a peacock-body is only one of much more kinds of bodymaking. I’m about to make some short clips by using some different materials for twisted bodies. Pheasant Tail fibres, Heron-wing-fibres, Ostrich herl or maribou feathers. It will take some time because my stdents will catch some chubs here…
Eberhard – I really look forward to checking out those clips when they’re ready.
Paul
Very well written article, with lots of food for thought. Personally I love my Dyna-King Kingfisher, but the Marco Polo does look the business.
Duncan, the Dyna-King Kingfisher is a great vice (and yes, when it comes to travelling in style, the Marco Polo does have something special going for it).
Paul
For possibly the ultimate in vices Google the J vice designed and made by Jay Smit of Durban South Africa. Almost all of SA’s notable flytiers use the vice.
I use my Marco polo ser a renzetti traveler and mu Jan Trvdek vices. The latter is not for Flys smaller than 18. Good article.
Walter – I’ll definitely check that out – thanks for the heads up 🙂
Many thanks also for your kind feedback, I really appreciate it.
Paul
Hmmm, where I live vise or vice both hold onto things. A vise holds onto material things. A vice holds onto naughty activities. I guess you guys are more efficient and cover both with one word.
To see an informative 25 minute video about Jay Smit’s J Vise search YouTube for this title [ Terry Andrews talks to Jay Smit about his J-Vice ]. Which includes a surprising bit of advice about the interaction between ceramic tube bobbin holders and the tying thread. Nice tying tool station, but I think that much cleverness & customization does come at a low cost. Perhaps leading down the path to tying vise vice. :- / .
The Nor Vise spinning vice is probably a good choice for tying a lot of flies quickly, and makes dubbing more robust, but I’m usually not in much of a hurry when tying kebari.
An informative overview of tying vise / tying vice options guys.
Hahaha, thanks David (perhaps fly tying could become a kind of vice when taken to extremes – or at least the habit of buying of feathers and new miracle materials?).
Thank you also for the kind words
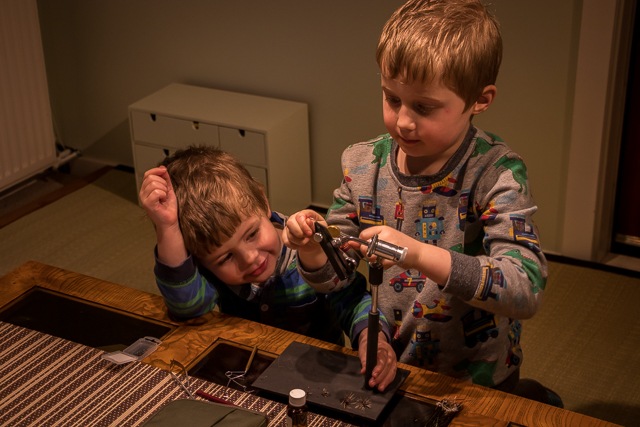
Ah, forgot to mention – two young lads learning how to use a fly tying vise early in life is no vice.
Never a truer word spoken David (my apologies that I missed this comment when you originally posted it).
Paul
A very interesting article, fully agree with the comments re the Dyna King pro, I have had their Supreme model for over twenty years, it is an excellent vice and I would recommend it.
Thank you Roger, I’ve yet to try the Supreme but everything coming out of the Dyna-King stable seems to be really high quality so it’s no surprise to me to hear that from you.
Thanks
Paul
Hi Paul – very interesting and helpful article, many thanks. I’m quite attached to my Scottie vice, does all the basics well, is portable and has a clamp and a pedestal. Also inexpensive for such a well designed piece of kit. Thanks again!
Cheers Trevor, it’s really valuable to get long term experience feedback on a vise. I wonder whether we should look to include the Scottie as an option for folks who have their eye on a Regal, but which might be out of reach in their short to medium term budget?
Paul
Vice, no question.
Aha! You heard it here first folks – by Jez’s decree it’s settled 🙂
Nice work hahaha
Paul